
Embarking on a comprehensive overhaul of a compact living space is one of the most rewarding yet logistically complex undertakings a homeowner can face. While large-scale estates offer generous margins for error, surplus storage rooms, and sprawling yards for staging materials, compact properties demand ruthless discipline, spatial economy, and meticulous schedule sequencing. Every single square foot must justify its existence both in the final architectural blueprints and on the active construction site. When you tear down walls, upgrade aging utilities, and reconfigure interiors, a lack of early planning can quickly snowball into compounding delays and blown budgets.
Executing this scale of project requires you to step into the shoes of a general contractor, even if you hire seasoned trade professionals for the heavy lifting. Success hinges on anticipating trade overlaps, managing off-site logistics, addressing structural and environmental surprises before they compromise your schedule, and deploying strategic design solutions that make modest rooms feel expansive, bright, and effortless to navigate. This practical guide walks you through every major phase of managing a full-scale remodel, providing actionable steps to help you navigate the chaos and deliver a finished space that balances form, function, and enduring structural integrity.
1. Pre-Construction Strategy and Footprint Planning
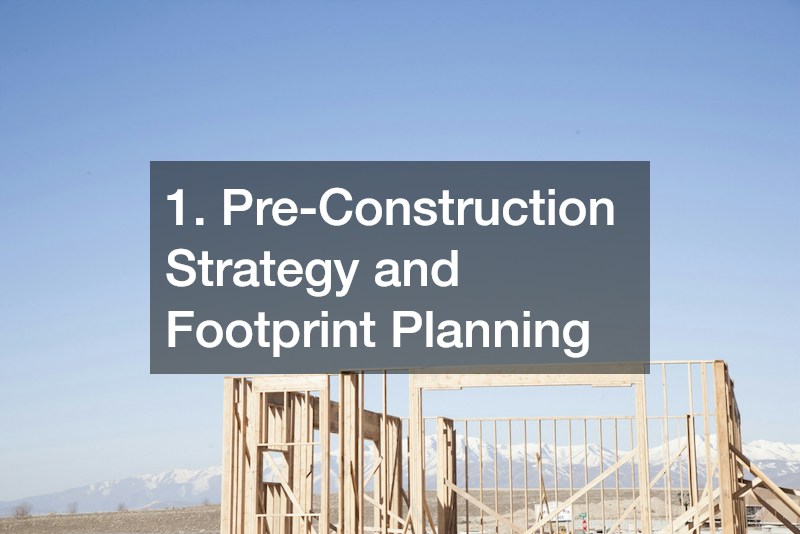
Before swinging a single sledgehammer, the foundational success of the entire project rests on defining the structural layout and aligning your design with municipal zoning. In modest properties, every partition wall carries immense consequences for sightlines, natural illumination, and circulation paths.
Conducting a Rigorous Spatial Audit
Start by evaluating how your household moves through the property during peak hours of the day:
- Map circulation choke points: Identify hallways, entry vestibules, and kitchen work triangles where multiple family members consistently collide.
- Identify dead volume: Look for unconditioned chases, redundant closets, oversized mechanical rooms, and empty voids beneath staircases that can be reclaimed for daily use.
- Track the path of daylight: Note which rooms receive morning versus late afternoon sun. Knocking down non-load-bearing partitions between east- and west-facing rooms can transform a dark interior into a bright, naturally illuminated space throughout the entire day.
- Measure ceiling heights: When square footage cannot expand horizontally, vertical volume must do the heavy lifting. Raising a ceiling from eight to nine or ten feet creates an immediate psychological sense of airiness.
Balancing Open Concepts and Structural Engineering
Opening up compact layouts often involves removing internal load-bearing walls that hold up the roof or upper floors. Rather than relying entirely on bulky dropped steel beams that lower ceiling heights and disrupt visual flow, consult an engineer about integrating a timber frame construction service to design elegant, high-capacity posts and exposed rafters. This approach supports necessary structural loads while introducing organic architectural warmth directly into the structural envelope of your small home.
Navigating Permitting and Setback Realities
- Pull property surveys early to confirm exact boundary lines, utility easements, and setback minimums.
- Check local floor-area-ratio (FAR) limitations if you plan any micro-additions, such as bump-outs for a powder room or breakfast nook.
- Submit detailed structural drawings well ahead of your target start date; municipal review cycles often take anywhere from four to twelve weeks, and starting demolition without an approved permit risks costly stop-work orders and aggressive fines.
2. Jobsite Logistics, Sanitation, and Work Zone Staging
Managing an active construction zone on a tight residential lot requires proactive logistics. Without an organized staging plan, your driveway, front yard, and living quarters will rapidly devolve into hazardous, unworkable clutter that slows down trades and frustrates neighbors.
Establishing Micro-Site Boundaries
Confining dust, debris, and trade foot traffic is vital, especially if you plan to occupy a portion of the house during minor phases:
- Install heavy-duty containment: Hang floor-to-ceiling 6-mil poly barriers fitted with magnetic self-closing entry zippers between the work zone and living spaces.
- Maintain continuous negative air pressure: Mount commercial air scrubbers equipped with HEPA filters in exhaust windows to pull fine particulate matter, sawdust, and masonry grit directly out of the building.
- Protect finished pathways: Lay down thick surface protection boards along every corridor leading to entryways to protect subfloors and existing thresholds from dropped tools and grit-covered work boots.
Site Amenities and Subsurface Protection
With multiple crews cycling through the jobsite daily, providing dedicated sanitary facilities is non-negotiable. Booking portable restroom rentals ensures that sub-trades have continuous, direct access to facilities on-site without repeatedly entering your private quarters or tracking drywall dust into clean zones. Place these units on flat, stable ground near the street for convenient weekly servicing.
At the same time, keep heavy supply flatbeds, concrete mixers, and waste dumpsters strictly confined to paved surfaces. Driving or parking heavy machinery across unpaved lawns can compact the soil and cause severe structural damage to buried absorption beds, quickly leading to an expensive and foul emergency septic repair that halts site work for weeks. Mark out all underground infrastructure with fluorescent utility paint and physical barriers before the first subcontractor arrives on site.
3. Uncovering Hidden Surprises and Subsurface Rough-Ins

Demolition day invariably exposes historical compromises, outdated construction practices, and deferred maintenance hidden behind old drywall and plaster. Addressing these issues immediately during the rough-in stage ensures your new finishes rest on a sound, durable substrate.
Remediation and Moisture Management
Older residences often harbor concealed plumbing leaks, roof intrusions, or exterior siding failures that have quietly degraded structural timbers over decades:
- Pull away degraded wall cavities completely to inspect the sill plates, studs, and subfloor sheathing for rot, carpenter ant activity, and active fungal growth.
- If you discover chronic dampness, musty odors, or saturated framing members, immediately contract certified water damage restoration professionals to thoroughly dry out the structural framing, apply antimicrobial treatments, and verify moisture readings with pin meters before hanging new insulation.
- Replace any structural joists or studs that have lost dimensional strength or load capacity rather than simply sistering cosmetic boards over rotted wood.
Mechanical Sequencing in Tight Cavities
Once the framing is verified, coordinate the mechanical, electrical, and plumbing rough-in phases. In tight quarters, wall cavities must simultaneously accommodate vent stacks, water lines, electrical home runs, and low-voltage cables:
- Sequence trades carefully: The general rule of thumb is HVAC ductwork and large exhaust vents first, plumbing second, and electrical wiring third, as flexible wiring easily routes around rigid pipe runs.
- Coordinate your pipe layout: Work closely with an experienced plumber to map compact, efficient drain-waste-vent pathways and supply manifolds. Routing lines thoughtfully through shared wet walls preserves valuable closet depths and prevents ugly soffit drop-downs in finished rooms.
- Upgrade domestic supply lines: Replace ancient galvanized iron pipes with modern PEX-A or copper systems to maximize water volume and pressure, ensuring multiple fixtures can run concurrently without sudden drops in flow.
4. Securing the Building Envelope and Weather Resistance
A home cannot be truly efficient, comfortable, or durable if its exterior shell remains leaky and vulnerable to seasonal storms. Upgrading the building envelope stabilizes internal temperatures, lowers monthly operating costs, and safeguards your interior investments.
Precision Openings and Fenestration
Drafty, out-of-square framing around older thresholds is a leading source of thermal transfer and moisture infiltration:
- Inspect rough openings thoroughly for plumb, level, and square alignment, shimming framing members as needed to prevent premature sash binding or latch failure.
- Complete each exterior door installation using durable composite sills, self-adhering flashing membranes across the rough sill, and closed-cell low-expansion foam around the perimeter jambs to establish an airtight, moisture-resistant barrier against driving rain.
- Upgrade windows to triple-pane or high-performance double-pane units with Low-E coatings tailored specifically to your regional climate zone to bounce solar heat gain away in the summer and keep radiant warmth inside all winter.
Fortifying Against Extreme Weather
Protecting your remodeled footprint from environmental extremes requires defensive exterior engineering:
- If your home is located along coastal corridors or severe storm paths, reinforce all structural window headers and install rated hurricane shutters to shield large glass openings from windborne debris and high-velocity pressure changes during severe weather events.
- Ensure exterior sheathing is fully taped at all seams, creating a continuous exterior air-and-water barrier that works in tandem with protective storm coverings.
- Inspect the roof-to-wall connections; install heavy-gauge galvanized hurricane ties between the rafters and wall top plates to dramatically boost uplift resistance during severe windstorms.
- Route downspout extensions at least six to ten feet away from foundation walls to prevent hydrostatic pressure from driving ground moisture directly into your newly finished basement or crawl space.
5. Modernizing Life Safety and Code Requirements

While aesthetic updates capture all the excitement, the primary objective of any major remodel must be the safety and security of its occupants. Older homes frequently feature undersized electrical systems, missing egress routes, and obsolete safety sensors that fall far short of modern International Residential Code (IRC) standards.
Implementing Integrated Life-Safety Infrastructure
Modern municipal codes mandate hardwired, interconnected notification systems throughout residential structures:
- Wire a comprehensive, interconnected fire alarm network that triggers alarms on every floor, inside each bedroom, and along every central hallway if smoke is detected anywhere in the building.
- Integrate dual-sensor units featuring both ionization and photoelectric smoke detection technologies alongside hardwired carbon monoxide detectors outside all sleeping zones and near gas-burning appliances.
- Ensure that the entire life-safety circuit includes dependable ten-year sealed lithium battery backups so the system remains fully operational during unexpected municipal grid outages.
Critical Electrical and Egress Upgrades
- Service entrance modernization: Replace outdated 60- or 100-amp main breaker panels with a modern 200-amp electrical panel to supply sufficient power for heat pumps, induction ranges, and electric vehicle charging equipment without overloading older busbars.
- AFCI and GFCI protection: Install Arc-Fault Circuit Interrupters (AFCI) on all living space circuits to prevent electrical fires caused by pinched wires, and Ground-Fault Circuit Interrupters (GFCI) in all kitchens, bathrooms, laundry spaces, and exterior outlets.
- Secondary egress verification: Ensure all bedroom windows meet modern egress requirements, which typically require a minimum clear opening width of 20 inches, a height of 24 inches, a total net clear opening of at least 5.7 square feet, and a sill height no higher than 44 inches off the finished floor.
- Staircase geometry adjustments: If you are modifying vertical circulation, rebuild stairs to ensure consistent riser heights (maximum 7.75 inches) and tread depths (minimum 10 inches) with continuous, graspable handrails to prevent everyday falls.
6. High-Impact Finishes, Storage, and Decorative Details
The final aesthetic and millwork layer is where a compact layout truly shines. By relying on smart storage interventions, tailored visual elements, and cohesive material choices, you can create a refined, uncluttered environment that feels surprisingly grand.
Customized Storage and Millwork Solutions
Freestanding dressers, bulky credenzas, and oversized entertainment centers eat up precious floor space and create visual clutter. Tailored, built-in cabinetry provides superior utility by taking full advantage of odd nooks and structural dead zones:
- Build upward, not outward: Run kitchen cabinets and living room shelving entirely up to the ceiling line, utilizing upper reaches for rarely used seasonal items.
- Recess into wall cavities: Build recessed medicine cabinets between standard 16-inch-on-center stud bays in the bathroom, and build shallow reach-in spice racks or key drops into kitchen partition walls.
- Incorporate multi-functional joinery: Install built-in banquette seating with deep pull-out drawers beneath the bench cushions in dining areas to eliminate the need for wide chair-clearance corridors.
Curating Visual Continuity and Wall Decor
Carefully curated artwork, oversized mirrors, and balanced wall hangings elevate modest rooms by establishing focal points that draw the eye through the interior. Investing in professional custom framing allows you to uniformly scale artwork, photography, and high-quality mirrors, anchoring them cleanly to the architecture rather than scattering mismatched frames that visually fragment the room:
- Hang large-scale framed mirrors directly opposite primary windows to bounce natural light deep into narrow corridors and double the perceived visual depth of the room.
- Maintain a consistent frame profile and matting width across gallery groupings to preserve clean lines and avoid overwhelming compact wall surfaces.
- Keep sightlines open from the main entry door to the furthest exterior window; uninterrupted visual access across multiple functional zones makes any floor plan feel remarkably expansive.
The Deep Clean and Settling In

Construction dust settles over days, even after heavy containment. Before bringing your furniture back into the house, schedule a professional post-construction cleaning service to wipe down the inside of all cabinets, wash window glass and tracks, wipe down door headers, and extract fine drywall dust from floors and HVAC vents. Once the air is scrubbed and the finishes gleam, you can move your household back into a transformed home that delivers exceptional craftsmanship, smart utility, and enduring daily comfort for decades to come.